

Prepared by: AsiaQuartz Editorial Team
Technical review by: AsiaQuartz Product, QC & Supply Chain Team
Last updated: July 2026
Quick answer: Prefab quartz QC should verify more than the surface. Before shipment, connect the exact product reference, approved drawings, dimensions, edges, sink templates, accessories, piece IDs, packaging and loading records. Tolerances and sampling must come from the approved purchase specification and inspection plan—not from one universal checklist.
Prefab quartz is already cut, edged and prepared for a defined use. That reduces downstream fabrication, but it also makes order identity and fabrication accuracy more important. A visually acceptable piece can still fail if its dimensions, cutout, edge, label or packing do not match the approved order.
This guide is designed for buyers, inspectors and suppliers reviewing a completed prefab order before container loading. It complements the broader What Is Prefab Quartz? guide and the product-specific Quartz Prefab Specifications route.Table of Contents
- Start with the approved inspection plan
- Surface and approved reference
- Dimensions and geometry
- Edges and finish
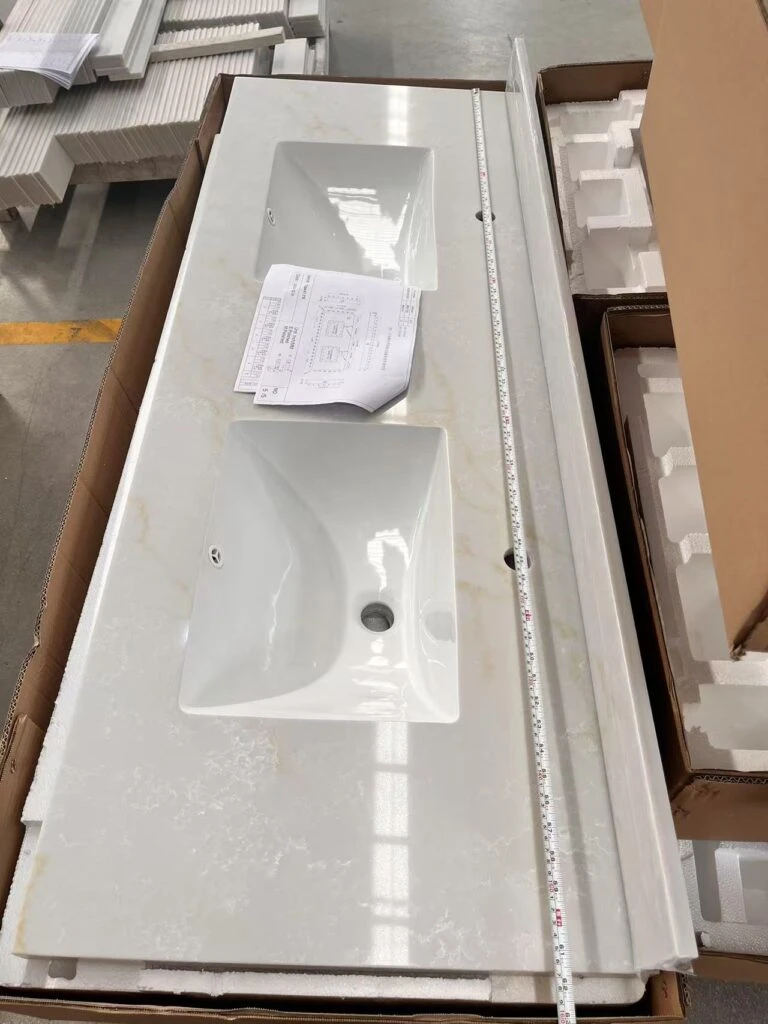
- Cutouts and faucet holes
- Matched accessories
- Labels and piece mapping
- Packing and loading
- Sampling and acceptance
- Inspection report template
- FAQ
1. Start with the Approved Inspection Plan
Do not begin with a generic checklist. Begin with the records that define what was approved. The inspector should be able to connect every measured or photographed piece to the same product and order scope.
| Approval Record | What It Should Identify | Why It Matters |
|---|---|---|
| Purchase order and product reference | Supplier, SKU, color, finish, thickness, component type and quantity. | Prevents inspection of a visually similar but unapproved product. |
| Approved drawing set | Drawing number, revision, dimensions, edges, cutouts, joints and installation interfaces. | Defines what the factory is expected to produce. |
| Physical or visual reference | Approved sample, product code and permitted visual variation. | Provides the basis for color, pattern and finish review. |
| Piece schedule | Piece ID, room or unit, quantity, orientation and matched accessories. | Connects production, inspection, packing and installation. |
| Inspection plan | Critical, major and minor characteristics; sampling; measurement method; acceptance criteria; reinspection rules. | Stops the inspector from inventing tolerances during the visit. |
| Packing plan | Crate grouping, piece protection, labels, crate weights, loading positions and securing records. | Links product QC with shipment risk. |
Approval rule: If the purchase order, drawing revision, product code and piece schedule do not agree, pause the inspection and resolve the document conflict before accepting the goods.
2. Material Surface and Approved Reference
Surface review remains important, but the acceptance basis should be the approved product reference—not a general expectation that every piece will look identical.
- Product identity: Confirm the product code, color, finish and production reference shown on labels and records.
- Color and visual range: Review pieces together under controlled, consistent lighting. Compare the batch with the approved sample or visual reference and the agreed permitted variation.
- Pattern and orientation: For veined or printed products, verify orientation, sequence and matched-piece requirements where the drawing calls for them.
- Finish: Check for dull areas, polish inconsistency, surface contamination, pinholes, resin spots, scratches, chips and other visible nonconformities.
- Defect classification: Classify defects as critical, major or minor under the agreed inspection plan rather than rejecting pieces solely because a mark is visible at an undefined viewing distance.
3. Dimensions, Thickness and Geometry
Measure against the approved drawing and specified measurement method. There is no single universal tolerance that is correct for every prefab size, edge construction, sink interface or installation condition.
- Tools: Use calibrated tools appropriate to the characteristic—such as a digital caliper or micrometer for thickness and a verified tape, straightedge, square or template for larger dimensions.
- Width, length and thickness: Record actual values against the approved requirement and tolerance.
- Squareness and diagonals: Compare diagonals or use an approved square where rectangular geometry is a controlled characteristic.
- Flatness or bow: Check where the purchase specification or installation interface requires it.
- Production-sequence coverage: Include pieces from the beginning, middle and end of the production sequence so the inspection can identify process drift rather than only confirming the first article.
- Matched pieces: For L-shapes, corner sets, seams or repeated units, verify the dimensions and joint interfaces as a set—not only as isolated pieces.
Do not invent a pass/fail number at the inspection table. If the drawing or PO does not define the requested tolerance, record the measured result and raise a clarification. A planning example is not an approved acceptance criterion.
4. Edge Profiles and Finished Surfaces
- Profile identity: Confirm the edge type and which sides are finished against the approved drawing or edge sample.
- Consistency: Compare multiple pieces side by side and check the profile transition, radius, bevel, lamination line and visible polish.
- Chips and repairs: Record the size, location and visibility of chips, filled repairs or edge damage and evaluate them under the approved defect criteria.
- Joint interfaces: Check seam edges, returns and corner pieces for alignment and compatible finish.
- Hidden edges: Verify that concealed edges still meet the functional requirements for support, bonding, sealing or installation.
5. Sink Cutouts, Faucet Holes and Appliance Interfaces
Cutouts should be inspected against the exact approved model and template. Sink manufacturers commonly provide model-specific CAD or cutout files because installation type, reveal, radius and support conditions vary by model.
- Sink model and installation type: Confirm undermount, top-mount, flush-mount or another specified condition.
- Approved template: Compare the actual cutout with the sink manufacturer’s template or approved project CAD file.
- Reveal: Verify positive, negative or zero reveal where specified.
- Position: Measure the cutout location relative to the front, back, ends, seams, cabinet and faucet positions.
- Corner radii and transitions: Confirm the specified geometry and smoothness.
- Faucet and accessory holes: Verify count, diameter, spacing and location against the approved fixture schedule.
- Support requirements: Confirm that the remaining material, sink support and cabinet interface follow the approved design and product guidance.
Do not use a universal “oversize is acceptable” or “undersize can be corrected” rule. Once material has been removed, some errors cannot be repaired without changing the intended reveal, support or appearance.
6. Backsplashes and Matched Accessories
- Verify the length, height, thickness, edge finish and orientation of each backsplash or accessory against the piece schedule.
- Confirm that matched accessories use the approved product and production reference.
- For directional or veined designs, review the visual relationship between the countertop and accessory pieces.
- Check finished ends and exposed edges identified in the drawing.
- Confirm that each accessory is packed and labeled with the correct primary piece or installation area.
7. Labels, Piece IDs and Packing-List Reconciliation
Prefab and cut-to-size programs are installation systems, not only material orders. Identification errors can make an otherwise conforming shipment difficult to install.
- Each piece should carry the agreed order reference, piece ID, dimensions and room, unit or position where applicable.
- Place labels on a protected non-show face using an adhesive and location that will not damage or contaminate the finished surface.
- Reconcile physical labels with the piece schedule and packing list.
- Record substitutions, split crates, spare pieces and replacement pieces clearly.
- Confirm that crate labels show the crate ID, contents, gross weight, destination and handling information required by the packing plan.
8. Export Packing and Container-Loading Evidence
Finished components need protection for visible faces, edges, corners and movement inside the crate. The packing system should be reviewed as part of the approved order—not after the pieces are complete.
| Checkpoint | Review |
|---|---|
| Piece separation | Confirm that adjacent finished surfaces and edges cannot abrade or strike each other during handling and transport. |
| Edge and corner protection | Check the material, coverage and retention of protectors against the packing specification. |
| Crate construction | Confirm structural condition, lifting points, closure method, internal support and the crate’s compatibility with the weight and unloading method. |
| Wood-packaging compliance | For raw-wood crates or dunnage, confirm the destination market’s applicable ISPM 15 treatment and marking requirements. Fully processed wood may fall outside the raw-wood scope. |
| Crate gross weight | Record the actual or approved gross weight and connect it to the loading plan and handling equipment. |
| Loading position | Record crate location, orientation, floor contact, weight distribution, center-of-gravity considerations and door-end protection. |
| Securing | Document bracing, blocking, lashing or other measures used to prevent longitudinal, transverse and vertical movement. |
| Shipment weight | Connect cargo records with the container tare and the required Verified Gross Mass process. |
The non-mandatory IMO/ILO/UNECE CTU Code provides global good-practice guidance for packing and securing cargo transport units. A loading photo is useful evidence, but it does not by itself prove that the cargo has been safely secured.
Recommended Pre-Shipment Evidence
- Approved product and batch layout under consistent lighting.
- Measurement records showing piece IDs, drawing requirements and actual results.
- Edge-profile and cutout close-ups connected to identifiable pieces.
- Matched backsplash or accessory sets.
- Piece labels and packing-list reconciliation.
- Open-crate photographs showing separation, supports and protection.
- Closed-crate labels showing crate ID and gross weight.
- Container-loading plan and photographs showing crate positions and securing.
9. Sampling and Acceptance Planning
A flat percentage such as “inspect 10%” is not automatically appropriate. The inspection plan should reflect the lot size, defect severity, production history, measurement cost and whether a characteristic is interchangeable or unique.
Critical or replacement-sensitive
Project-specific cutouts, matched sets, unique pieces, safety-related interfaces and first articles may justify 100% verification.
Major functional characteristics
Dimensions, edges, labels and assembly interfaces should follow the agreed inspection level and acceptance criteria.
Cosmetic characteristics
Visual attributes may use an agreed sampling plan when the product, reference and permitted variation are clearly defined.
Ongoing repeat programs
Stable production history may support a different inspection strategy than a first order, new SKU or changed process.
Where the buyer adopts acceptance sampling by attributes, the current ISO 2859-1:2026 provides an AQL-indexed lot-by-lot sampling framework. It does not replace the need to define which characteristics are critical, what constitutes a defect, and which dimensions require direct measurement or full verification.
10. One-Page Inspection Report Template
| Field | What to Record |
|---|---|
| Order identity | PO, supplier, factory, product code, color, finish, drawing revision and inspection date. |
| Lot and scope | Total quantity, inspected quantity, sampling basis, piece IDs and production-sequence coverage. |
| Reference documents | Approved sample, drawings, piece schedule, sink templates, inspection plan and packing plan. |
| Measurement results | Requirement, tolerance, actual result, tool used and pass/fail status for each measured piece. |
| Visual and edge review | Defect category, location, quantity, photographs and disposition. |
| Cutouts and accessories | Template/model, reveal, position, radii, holes and matched-piece results. |
| Labels and packing | Piece reconciliation, crate condition, protection, crate IDs, gross weights and wood-packaging records. |
| Loading evidence | Loading plan, crate position, securing, door-end restraint, shipment-weight record and photographs. |
| Nonconformance and disposition | Affected IDs, required correction, reinspection scope, acceptance authority and final status. |
Remote review boundary: Photos and records can support a preliminary document review, but they do not reproduce tactile inspection, calibrated on-site measurement, concealed-condition verification or independent chain of custody.
FAQ:
The inspection scope should be defined in the purchase specification and approved inspection plan. Critical project-specific dimensions, sink cutouts, matched sets, first articles, and replacement-sensitive pieces may require 100% verification. Cosmetic attributes may be reviewed under an agreed acceptance-sampling plan.
Remote evidence can support review of dimensions, labels, visible finish, cutouts, packaging, crate identification, and container loading, but it cannot fully replace calibrated measurement, tactile surface review, verification of concealed conditions, or an independent on-site inspection when the order risk justifies one.
Use the approved sink model, the manufacturer-specific cutout template or CAD file, the specified reveal type, and the project drawing. A universal positive or negative cutout tolerance should not be applied to every sink model.
No. Raw-wood crates and dunnage may need treatment and marking under the destination market’s ISPM 15 rules. Fully processed wood materials such as plywood may be outside the standard’s raw-wood scope. Confirm the destination requirement and the actual packaging materials used.
Record the nonconformance, affected piece IDs, evidence, required correction, reinspection scope, disposition, and approval authority in a formal inspection report, corrective-action record, or purchase-order amendment. Do not rely only on informal messages.
Prefab QC must verify fabrication and order identity in addition to the material surface. Dimensions, edges, cutouts, matched accessories, piece labels, packing, and loading evidence must align with the approved product reference, drawings, and piece schedule.
Method: This guide separates universal inspection principles from order-specific acceptance criteria. It does not create a universal tolerance or sampling plan. Final requirements must be stated in the approved drawings, purchase specification, inspection plan, packing plan and applicable destination requirements.